Creating and using hyperlinks in the Website Builder.
Hyperlinks can be added throughout your event website to direct users to Pages you've created in the Website Builder, external web addresses, e-mail addresses, and documents. What's more, you can also link buttons and images!
Creating Links
Hyperlinking Text
When writing text in the body of a page, you can transform any piece of in-line text into a link:
- Enter your text and highlight it.
- From the toolbar above, select the link icon.
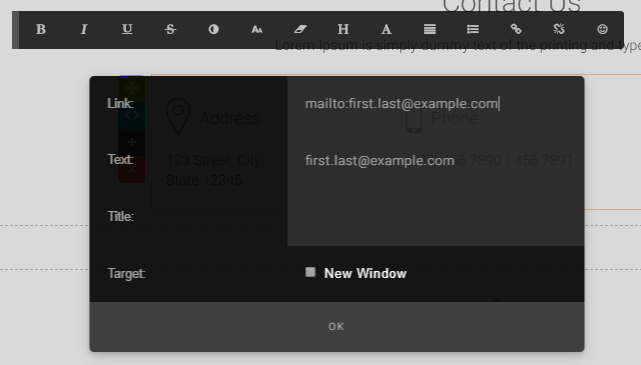
- Type the address where you'd like the text to direct users to, and a Title for accessibility purposes.
- If you the link should open in a new browser tab, check the "New Window" option.
- Click "OK".

To remove the link, highlight the linked text and use the broken link icon that appears to the right of the link option in your toolbar.
Hyperlinking Buttons & Icons
Buttons and icons in the content library are pre-formatted as links. All you have to do is modify the destination of the button:
- Add a content block that includes a button.
- Hover over the button and select the "Edit Link" option that appears.
- Like when hyperlinking text, enter the link address, button text (if it should change), a title and target.
- Click "OK".
Note: You can use this method to redirect the call-to-action buttons in your Header. Recall, though, that Main Navigation is determined by what you've dragged into this region in Pages.
Hyperlinking Images
Image blocks include a Link option that will point users who click the image somewhere.
- Using one of the content blocks that feature an image, use the Camera icon to upload an image from your hard-drive.
- After you've uploaded your image, hover over the image and you'll see an orange icon of a paperclip. This opens the Image Settings.
- The image's setting includes a few things, like the source (in other words, the full URL of the image you've just uploaded and saved), title (the name of the image valuable for accessibility and SEO), and a link (hyperlink).
- Select "Link"
- Enter the URL of where you'd like to direct users who link on the image to.
- Click "OK".

Adding a Link to your Main Navigation
Links to external web addresses can also be added to your main navigation. Following the steps outlined here.
Types of Links
Using the various link options in this article, you can hyperlink content to the following:
- Web addresses
- Pages in your Event site
- Email addresses
- Telephone numbers
- Documents
- Anchor links
Email addresses
In the Link field, preface the email address you'd like to to link to with "mailto".

Telephone numbers
In the Link field, preface a phone number with "tel:".
Documents
Like a web address, you create a hyperlink to any document hosted on the web by entering the link to the file. The file might be hosted on your website, another web property you own or an online file hosting service (e.g. Dropbox or OneDrive).
You can also host files on raisin in the Document Manager:
- Go the "Message Templates" section of your event or for Peer-to-Peer events, the "Edit - Share/Badge/Welcome" section and click Edit.
- From the Design Editor, select the "Document Manager" icon and upload your document. Click to insert it.

- Inserting the document will create a link in the editor. Right-click the link and choose Properties.
- From the Document properties, copy the URL in the Link field -- from the "https://" until the end of the document extension (e.g. ".PDF")
- Return to the Website CMS and paste the URL where the document should live on your event site.
Anchor links
raisin is an Angular application, which does not support all methods of anchoring links. To smoothly anchor to content on the same page, we recommend the following:
1. In the content block where the anchor should exist, toggle to HTML mode.
2. Navigate to the part of the content you'd like to jump to.
3. Add an "id" and name it accordingly. For example, here we are setting an anchor to the "Hobby" subtitle with an id of:
id="hobby"

4. Now, to link to the anchor, navigate to the part of the page where users will click.
5. Toggle to HTML mode of the content block.
6. Wrap the link text with the following code and add the id you've set in the anchor. In this example, click here is the link text and "hobby" is the id.
<a href="javascript:document.getElementById('hobby').scrollIntoView({behavior: 'smooth', block: 'center'})" title="">Click here</a>
7. Save
Anchoring content on a different page is not currently supported.